Dear CAD HELP CENTER readers welcome back after a long time with a new solution.
Today I will describe How to install and configure the Solidworks 2007 on Windows 7 x64 bit.
Earlier I have got some queried regarding the support of Solidworks 2007 in Windows 7. A lot of my friends are in confusion weather Solidworks 2007 will work or not in Windows 7 if they will upgrade their operating system. Officially only Solidworks 2009, Solidworks 2010 and Solidworks 2011 are support Windows 7 (32 & 64 bit). Solidworks 2007 and Solidworks 2008 are not supports Windows 7 officially.
But we need not to worry about the supports because there are a lot of ways to do this job.
Officially Solidworks 2007 & 2008 is not supported but we can install and use both versions in Windows 7 (32 & 64 bit).
Here we will see that how can we install & configure Solidworks 2007 in Windows 7 x64 bit.
First of all install Solidworks 2007 or 2008 like same as in Windows XP. (Remember that Solidworks 2007 or 2008 (32 bit) can be installed in both Windows 7 (32 & 64 bit). Solidworks 2007 or 2008 (64 bit) can be installed in only Windows 7 64 bit.
After installation you will find the Solidworks icon on the Desktop screen. Do not run the program just after installation because it will show the compatibility error and will not run.
Right Click on the Solidworks icon and select Properties as shown in below picture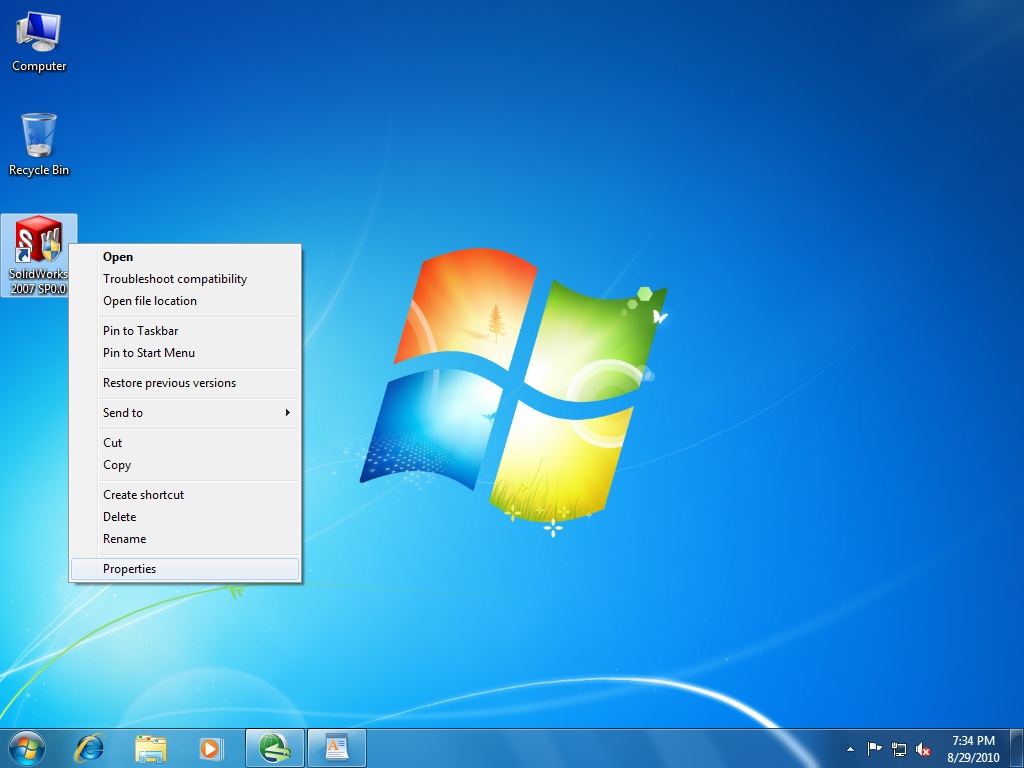 1. Click on Compatibility Tab.
2. Check mark Run this program in compatibility mode.
3. Select the Windows type you want for Compatibility Mode. Select Windows XP (Service Pack 2)
4. Then if you want this setting for all users then Click on the option Change Setting for all users.
5. Thereafter Click on Apply to apply this setting.
6. Then Click OK button.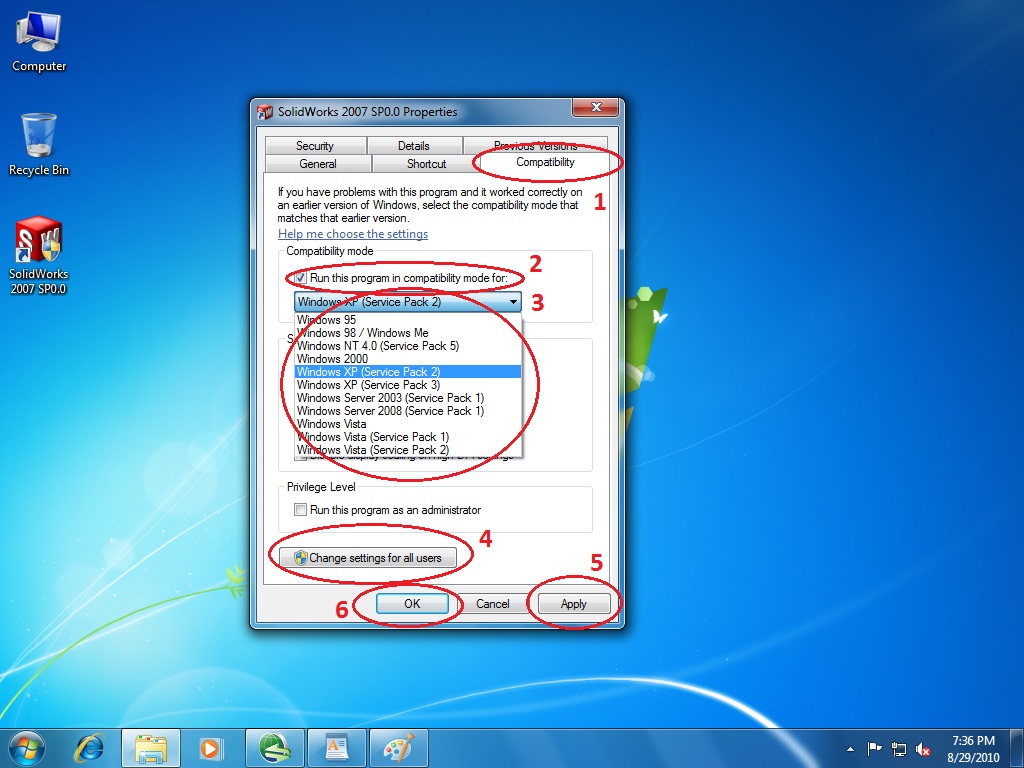
After that run the Solidworks by double clicking on the Solidworks icon or right and select Open. This will run the program make Solidworks to run in compatible mode. In between the process the compatibility wizard can ask you to do this or not in that case select the next button. Compatibility wizard will show you the below screen after completion.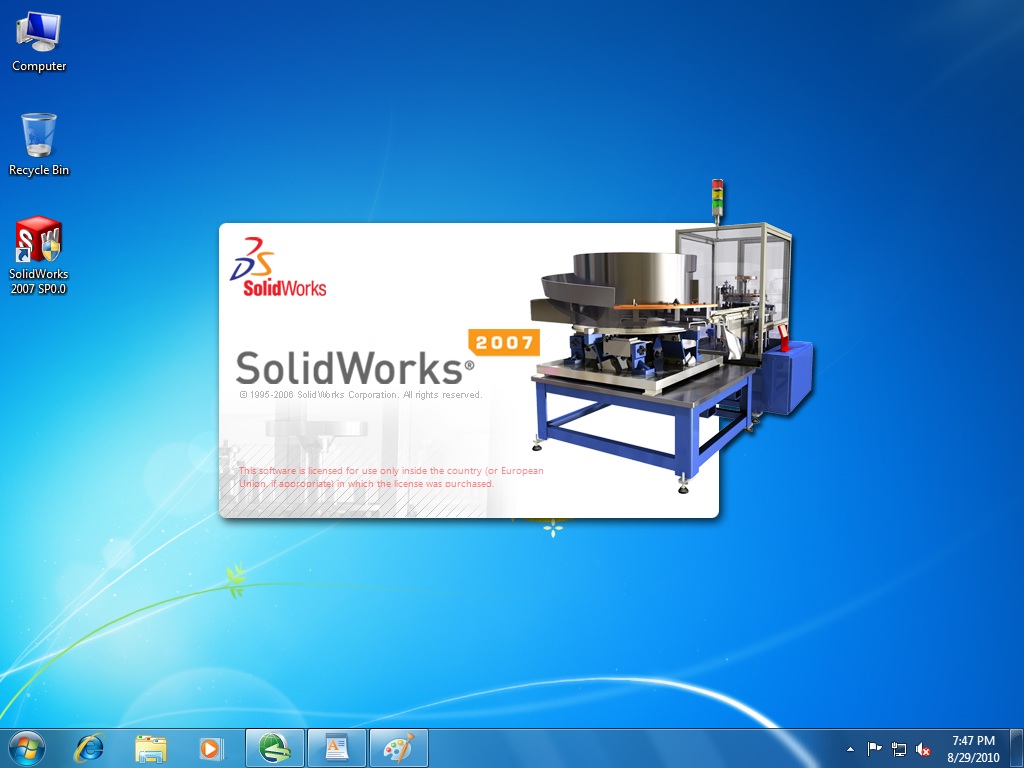 Now you can create or Open any Part or Assembly file. Click on New.
Select Part and then Click on OK button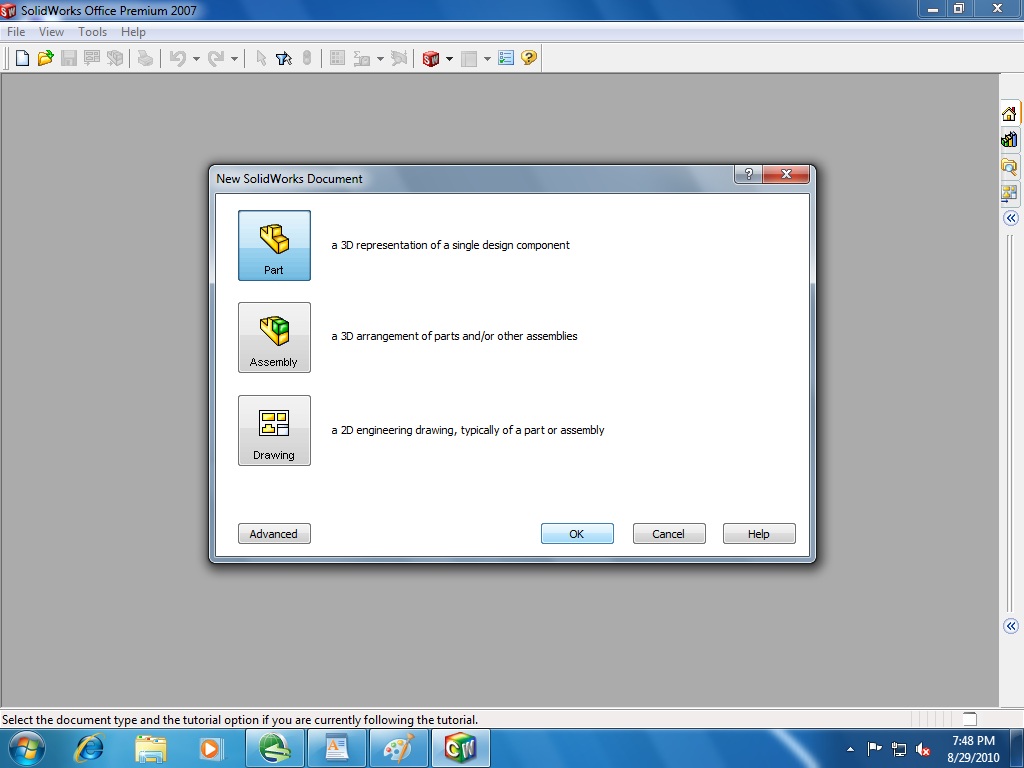 Now Solidworks 2007 or Solidworks 2008 is ready for use. Make whatever you want
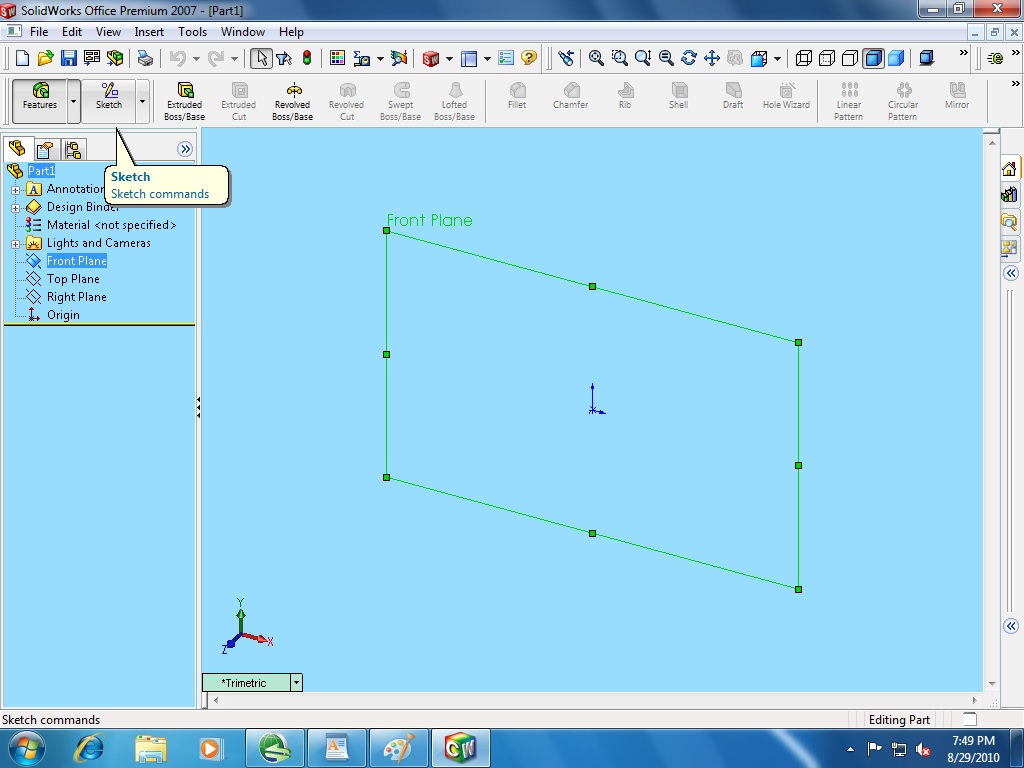 So if anyone using Windows XP or Windows Vista and want to upgrade their operating system to Windows 7 then you can upgrade. This will improve your working speed and performance.
If anyone has any issue or any other help then leave your comments
Today I will describe How to install and configure the Solidworks 2007 on Windows 7 x64 bit.
Earlier I have got some queried regarding the support of Solidworks 2007 in Windows 7. A lot of my friends are in confusion weather Solidworks 2007 will work or not in Windows 7 if they will upgrade their operating system. Officially only Solidworks 2009, Solidworks 2010 and Solidworks 2011 are support Windows 7 (32 & 64 bit). Solidworks 2007 and Solidworks 2008 are not supports Windows 7 officially.
But we need not to worry about the supports because there are a lot of ways to do this job.
Officially Solidworks 2007 & 2008 is not supported but we can install and use both versions in Windows 7 (32 & 64 bit).
Here we will see that how can we install & configure Solidworks 2007 in Windows 7 x64 bit.
First of all install Solidworks 2007 or 2008 like same as in Windows XP. (Remember that Solidworks 2007 or 2008 (32 bit) can be installed in both Windows 7 (32 & 64 bit). Solidworks 2007 or 2008 (64 bit) can be installed in only Windows 7 64 bit.
After installation you will find the Solidworks icon on the Desktop screen. Do not run the program just after installation because it will show the compatibility error and will not run.
Right Click on the Solidworks icon and select Properties as shown in below picture
2. Check mark Run this program in compatibility mode.
3. Select the Windows type you want for Compatibility Mode. Select Windows XP (Service Pack 2)
4. Then if you want this setting for all users then Click on the option Change Setting for all users.
5. Thereafter Click on Apply to apply this setting.
6. Then Click OK button.

After that run the Solidworks by double clicking on the Solidworks icon or right and select Open. This will run the program make Solidworks to run in compatible mode. In between the process the compatibility wizard can ask you to do this or not in that case select the next button. Compatibility wizard will show you the below screen after completion.
 Now you can create or Open any Part or Assembly file. Click on New.
 Select Part and then Click on OK button
 Now Solidworks 2007 or Solidworks 2008 is ready for use. Make whatever you want
 So if anyone using Windows XP or Windows Vista and want to upgrade their operating system to Windows 7 then you can upgrade. This will improve your working speed and performance.
 If anyone has any issue or any other help then leave your comments


1 comments:
Thanks for the detailed description. What are my options if I do not have windows XP as an option? i only have server 2008 and vista packs 1,2,3. FYI i do have the XP option in properties of DWGeditor,eDrawings,and Solidworks explorer.
Thanks, Mike
Post a Comment